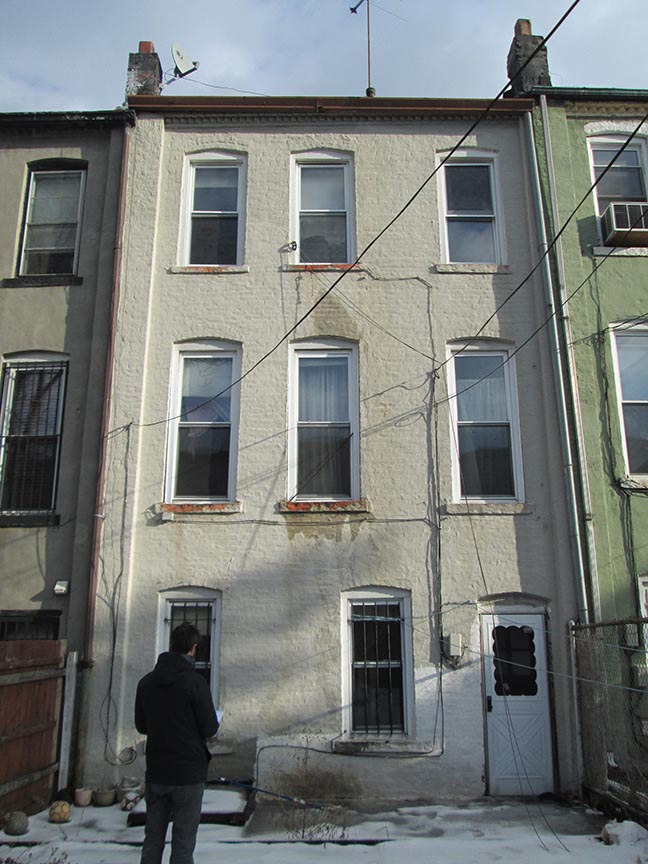
Another Thursday, another Before & After. We’re back in our Crown Heights Limestone project again to focus on the best part of almost any renovation: the kitchen.
We’ve already seen the view of the back of the parlor level, but let’s get into the kitchen itself.
There was never a kitchen on this floor originally, but the basement kitchen was… intense.
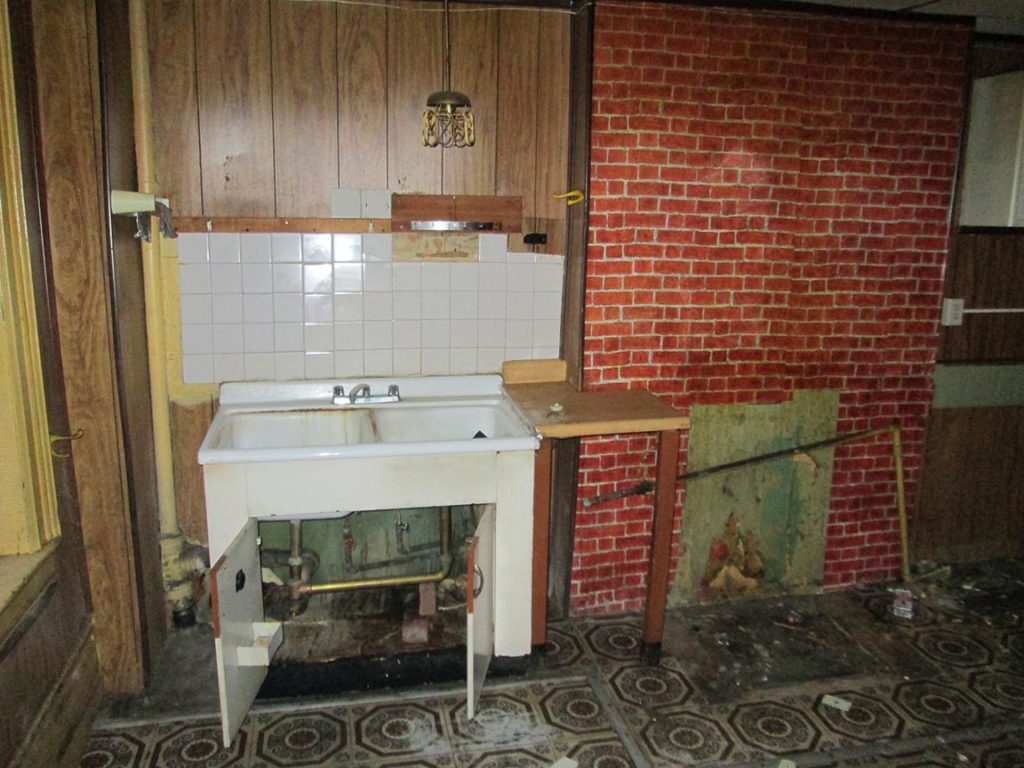
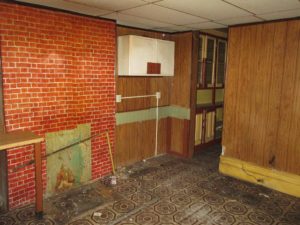
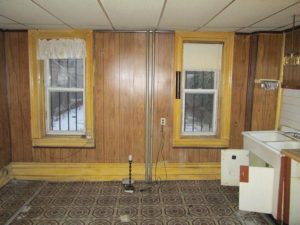
It feels somehow unkind to this poor house to show these. Needless to say, the basement got a full makeover as well, but as its own apartment unit, with the family’s kitchen upstairs.
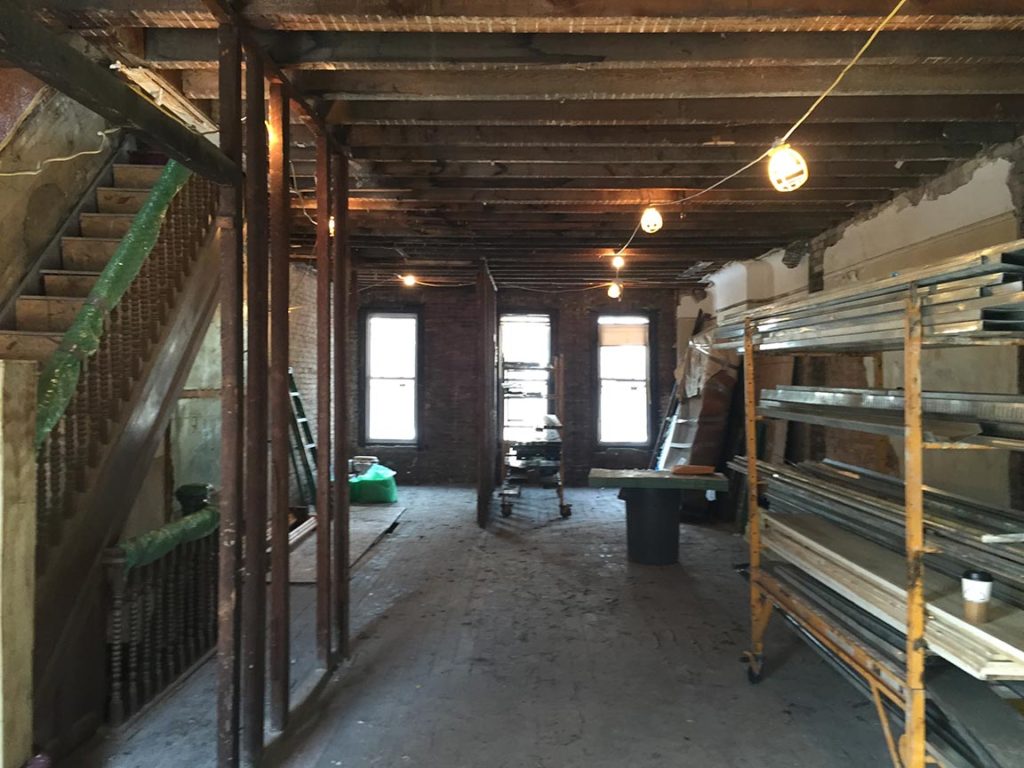
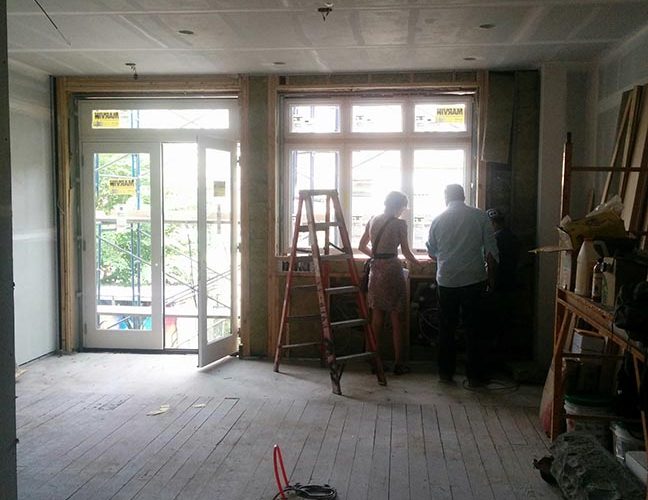
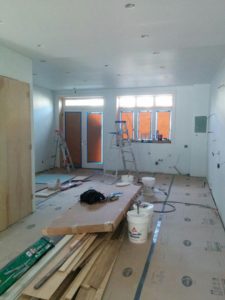
Back upstairs, the rear parlor had a set of three evenly-spaced windows with low sills. In order to place a kitchen here, the sills needed to be raised to sit above the counters. On landmarked properties this often poses a problem, but from a logistical standpoint, it’s less difficult than a home owner might think. Changing your brick sounds intimidating, but if your renovation is already a gut, it’s well worth the effort to make the layout work. In for a penny, in for a pound! Because we were already making masonry changes for the sills and the French doors, we also scooted the window opening few inches in from the corner of the house, so that cabinets could sit comfortably on the wall next to the window without feeling squished.

We have a pretty cool shot of the mason laying new brick into the opening. Note the new steel header above him there, which is what allows these openings to get so wide while supporting the house above. That’s another item that sounds scary, but is really do-able for a gut renovation: structural steel! As long as the weight above it is properly supported, steel headers can get installed easily during a gut to handle what used to require lots of solid walls. A structural engineer calculates what you’ll need to keep the house stable, and then you can open things safely. These photos show the newly-finished openings (bonus pile of bricks on the floor), and then the newly-installed windows and all the lovely light they admit.


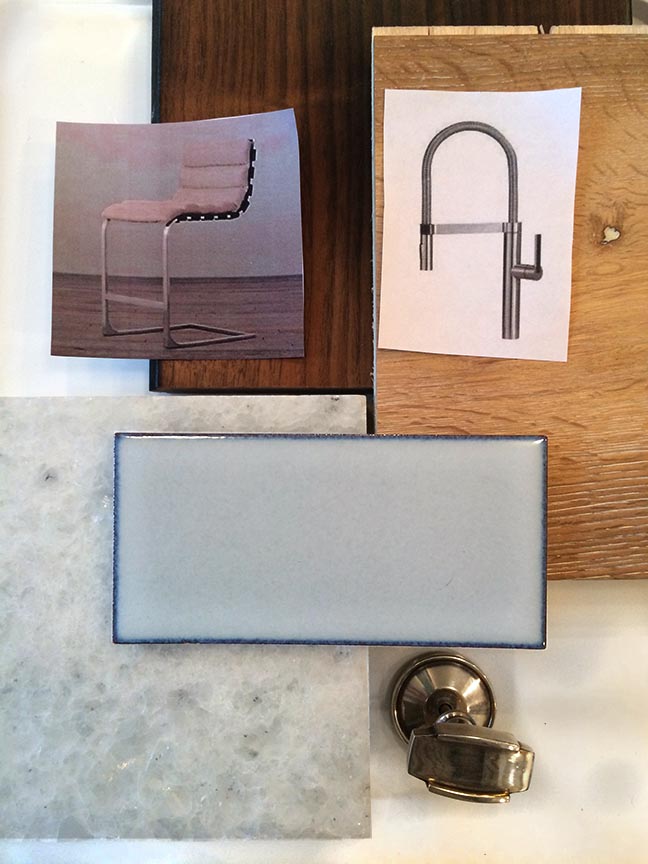
Once the shell is updated, the bulk of kitchen transformations come down to cabinetry. Cabinets get built off-site, so we don’t have a lot of exciting photos of that process. But here is the collection of materials chosen after our kitchen-planning meeting, back before the drawings were even finalized. We stuck to this plan (not always the case!): lime-washed oak cabinets, chestnut-stained floors, natural quartzite counters, cornflower blue Savoy subway tiles from Ann Sacks, professional-style fixtures in stainless steel, and traditional touches from polished nickel vintage light fixtures. Installed, they balance between traditional and modern.
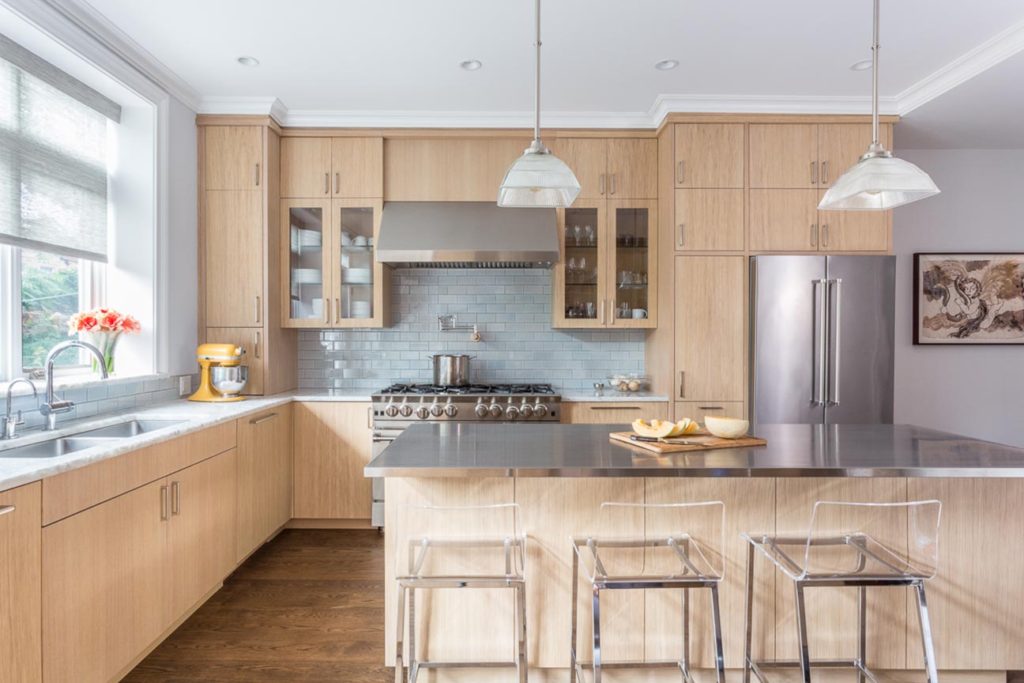
This client is a serious cook with a professional degree, so planning the layout and finishes were particularly fun. When a kitchen is going to be a real workhorse, you know that even small details will be appreciated daily. Everyone wanted to get a little more creative than the classic white shaker style that so often compliments a Brownstone. The door style is inset, which is a traditional construction, but the slab-front doors and rift-sawn wood (a term that describes the direction in which the wood is milled, with rift meaning that the grain pattern is long and straight) take it in a modern direction. The island was originally planned with quartzite counters, but partway into planning our client was reminiscing fondly about the stainless steel counters from culinary school; would it be crazy to have those in a private home? Crazy-cool, maybe.
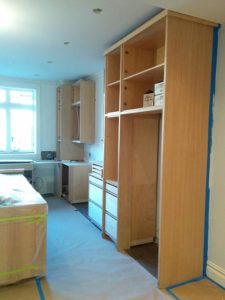
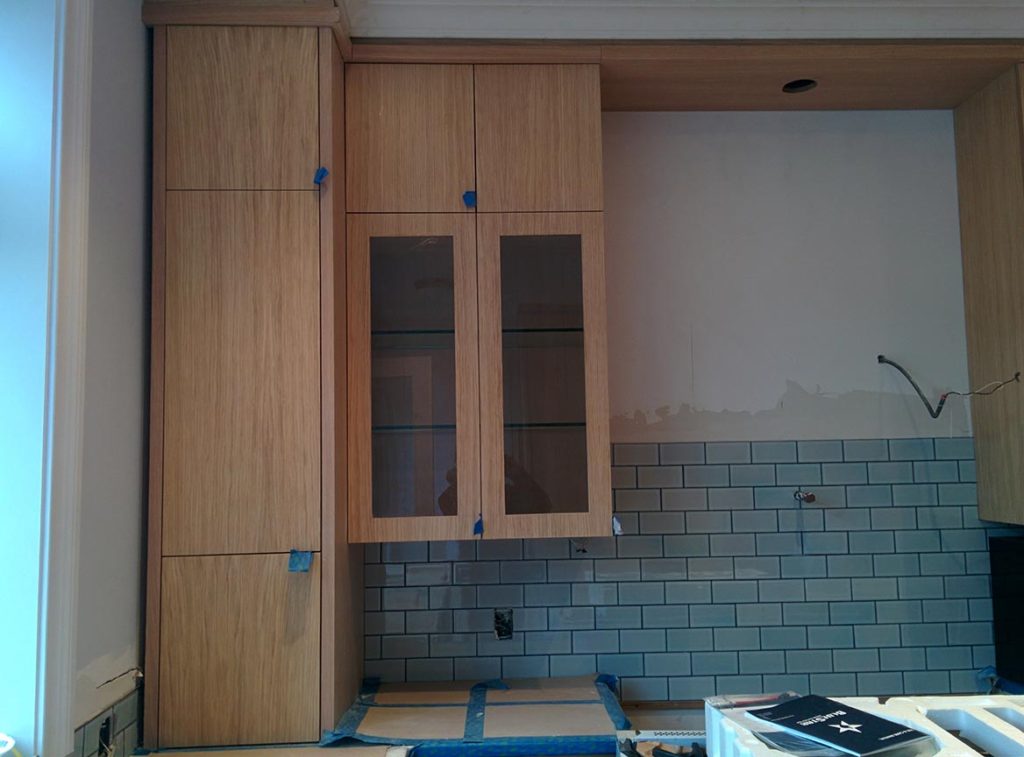
Cabinet installation happens right near the end of a project, with backsplash tiling and counter installation not far behind. In the end, this is one of my favorite kitchens I’ve had the pleasure of designing for BHA.

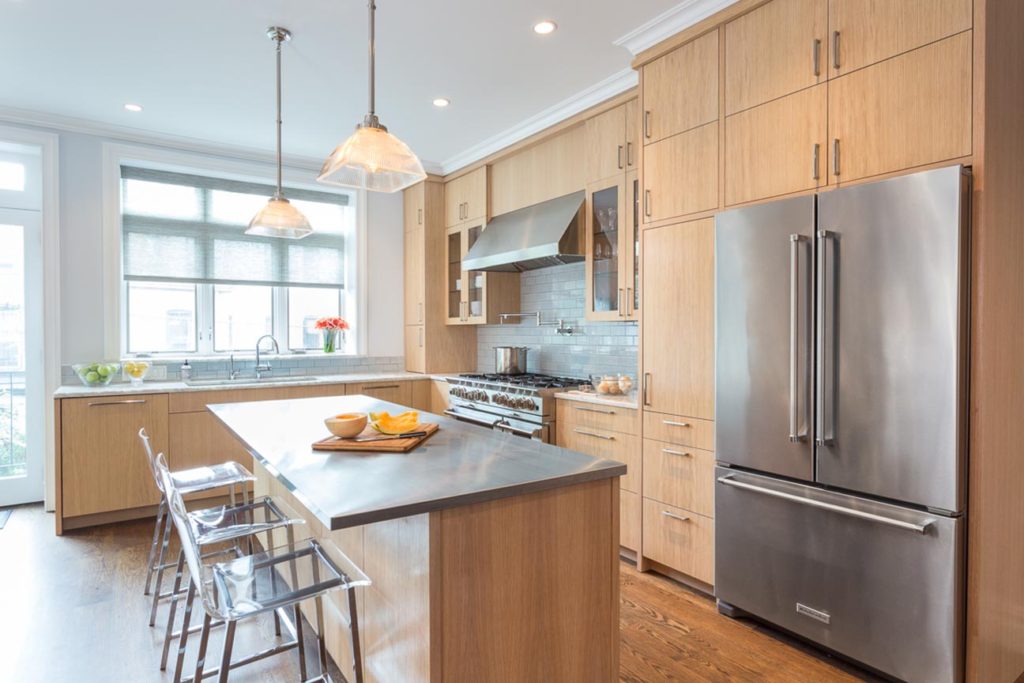
That’s a pretty killer B&A, right there.
before&after, brick, brooklyn, brownstone, in-progress, kitchen, open concept, renovation, townhouse, windows